Creating and Managing Email Templates
Build email templates with sections, smart content, variables, real-data previews, sender details, and test sends.
Written By David Dayan
Use Email Studio to control the content and design of the emails Photeria sends for client accounts, jobs, listings, invoices, payments, and property website inquiries. Open Templates → Email and select the email type you want to change.
Editing requires the Templates: Edit permission.
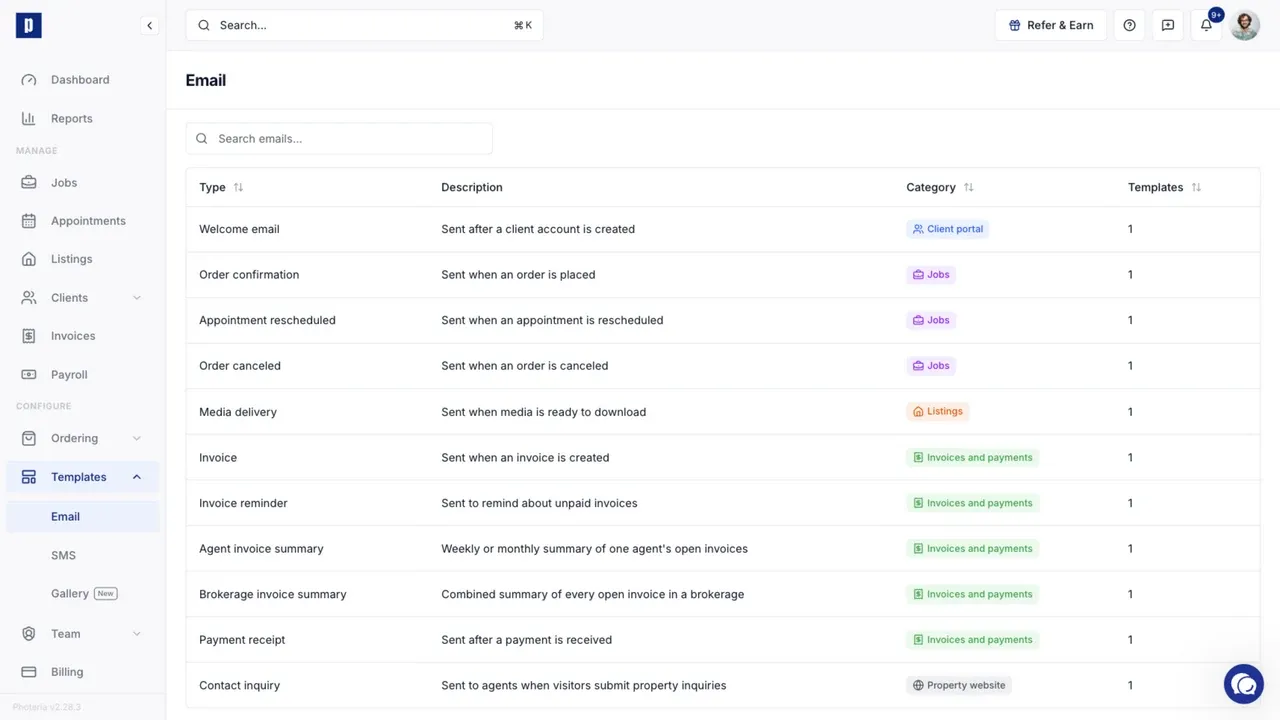
Manage templates for an email type
Every email type has one default template. Automated emails use that default.
Select an email type to manage its templates:
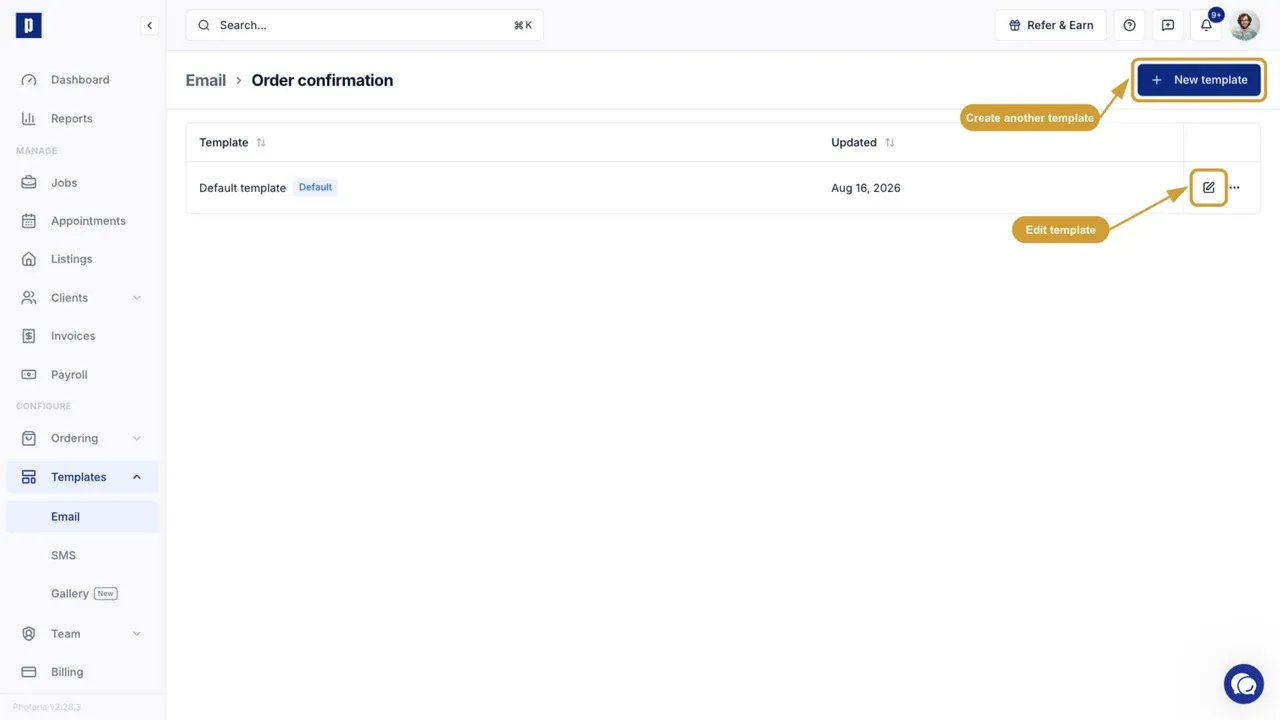
- Select the edit control to customize an existing template.
- Select New template to start another template from the current default.
- Open the actions menu to set another template as the default, duplicate it, or delete it.
Additional templates do not change automated emails until you set one as the default. They are available when a workflow lets you choose a template for a manual email.
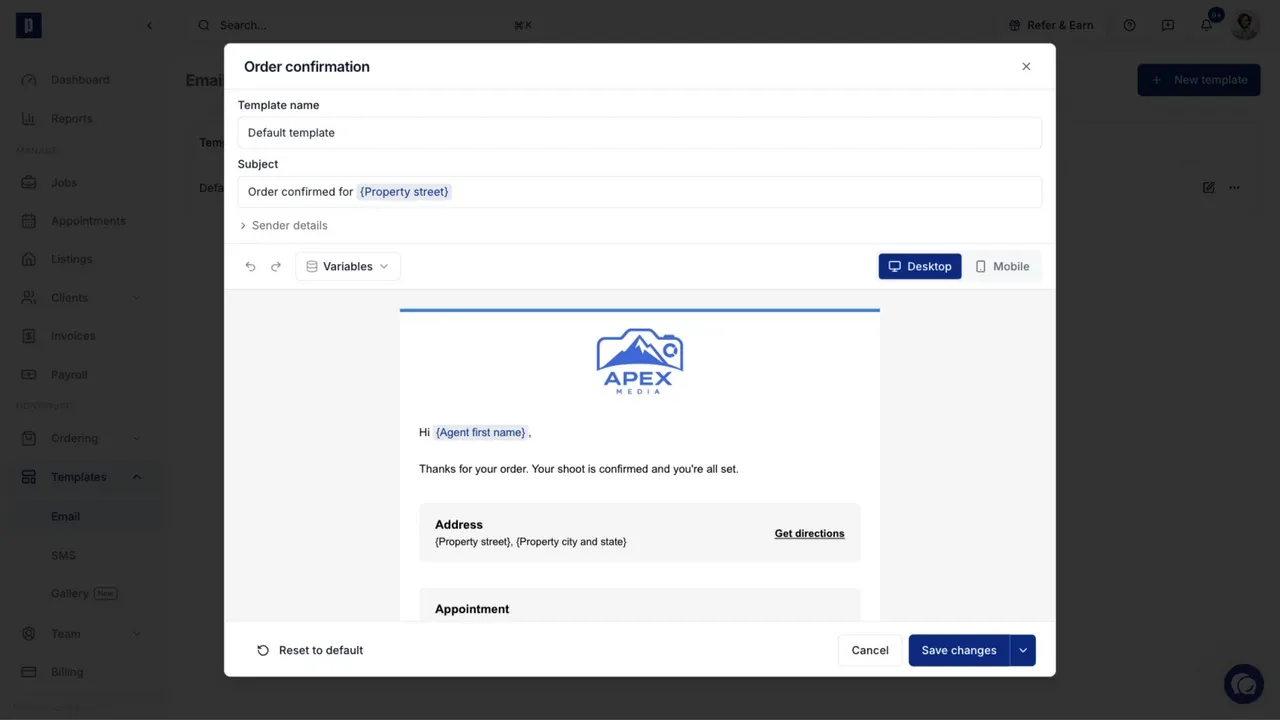
Edit an email
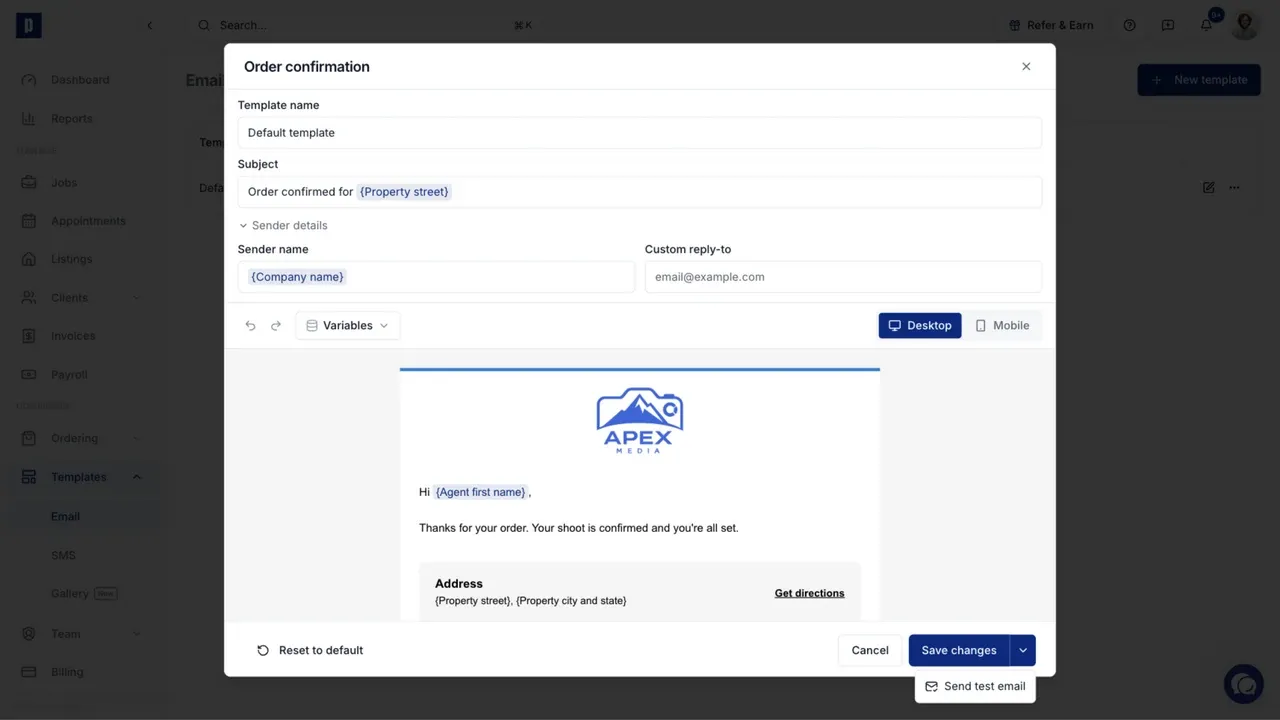
The editor includes the template name, subject, sender details, desktop and mobile previews, and the email canvas. Select any section in the canvas to work with it.
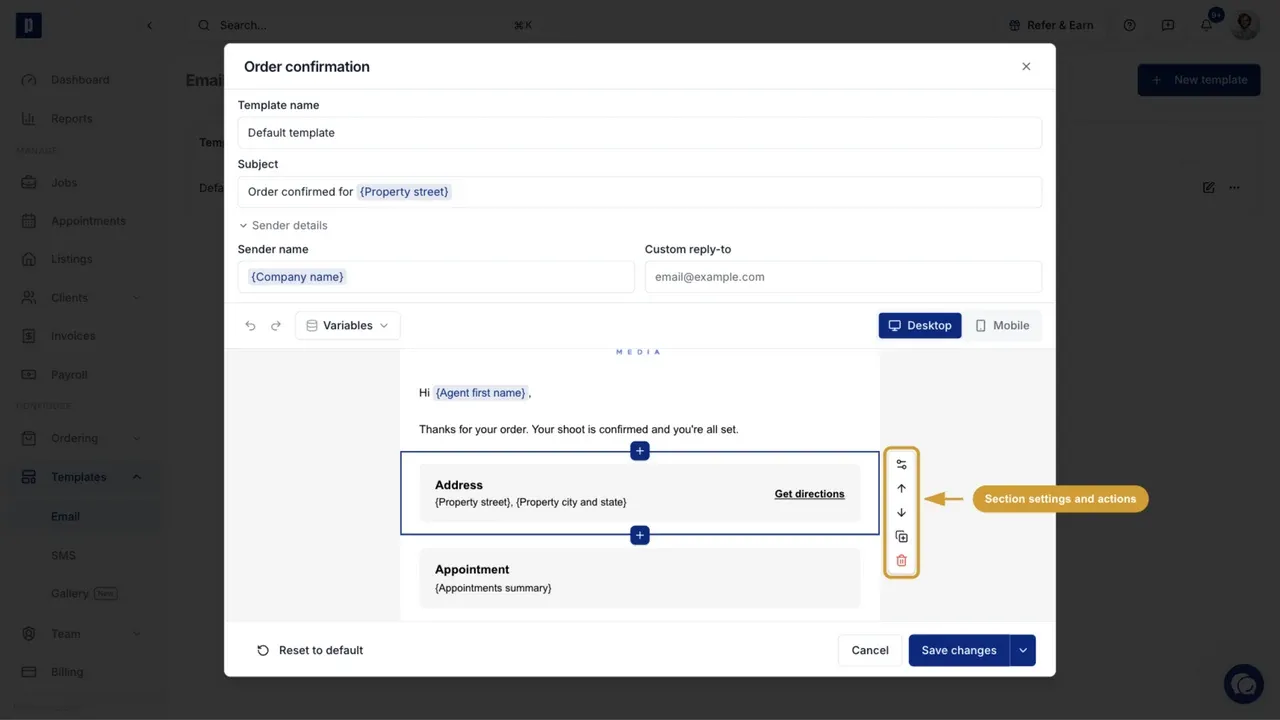
For the selected section, use the controls beside it to:
- Open its settings when that section has configurable options.
- Move it up or down.
- Duplicate it.
- Remove it.
Use the blue plus control above or below a section to insert content at that position.
Add basic and smart sections
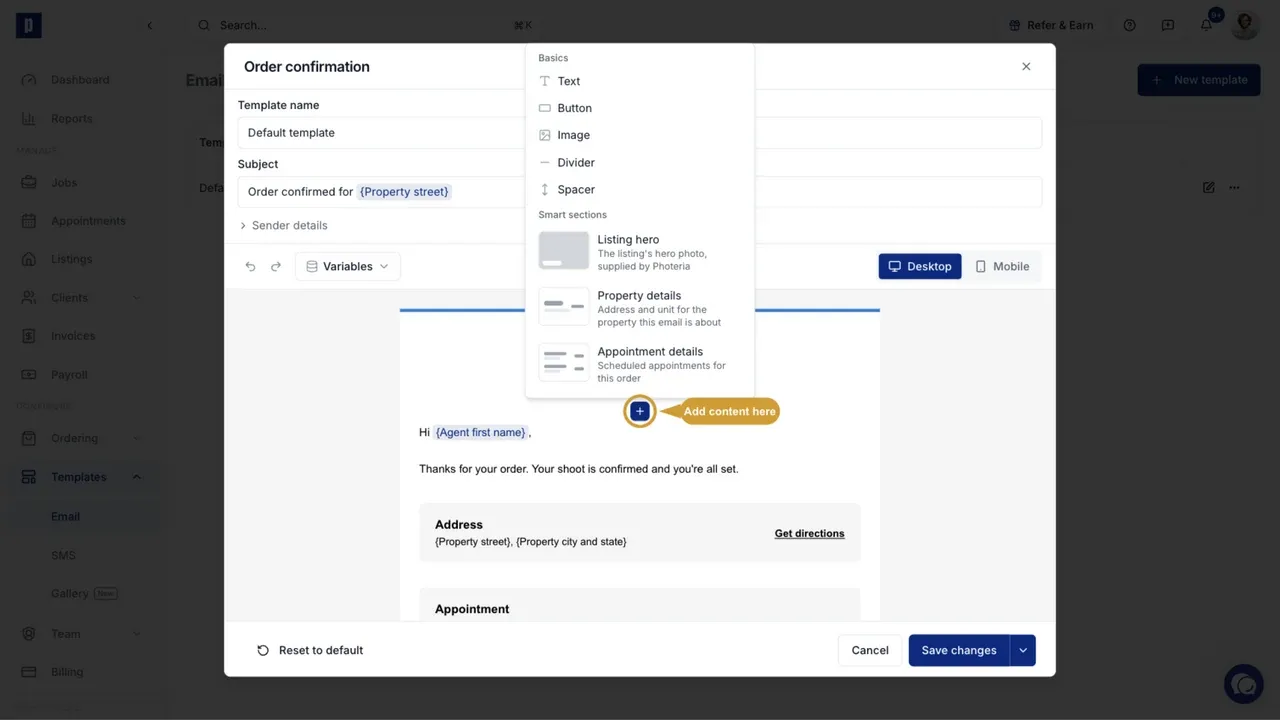
Select a blue plus control to add a section.
Basic sections include text, buttons, images, dividers, and spacing. Smart sections are ready-made layouts that fill themselves with data from the job, listing, invoice, client, or brokerage connected to the email.
The smart sections offered depend on the email type. An order confirmation can include the listing hero, property details, and appointment details. Invoice emails offer invoice and payment information instead.
Insert variables
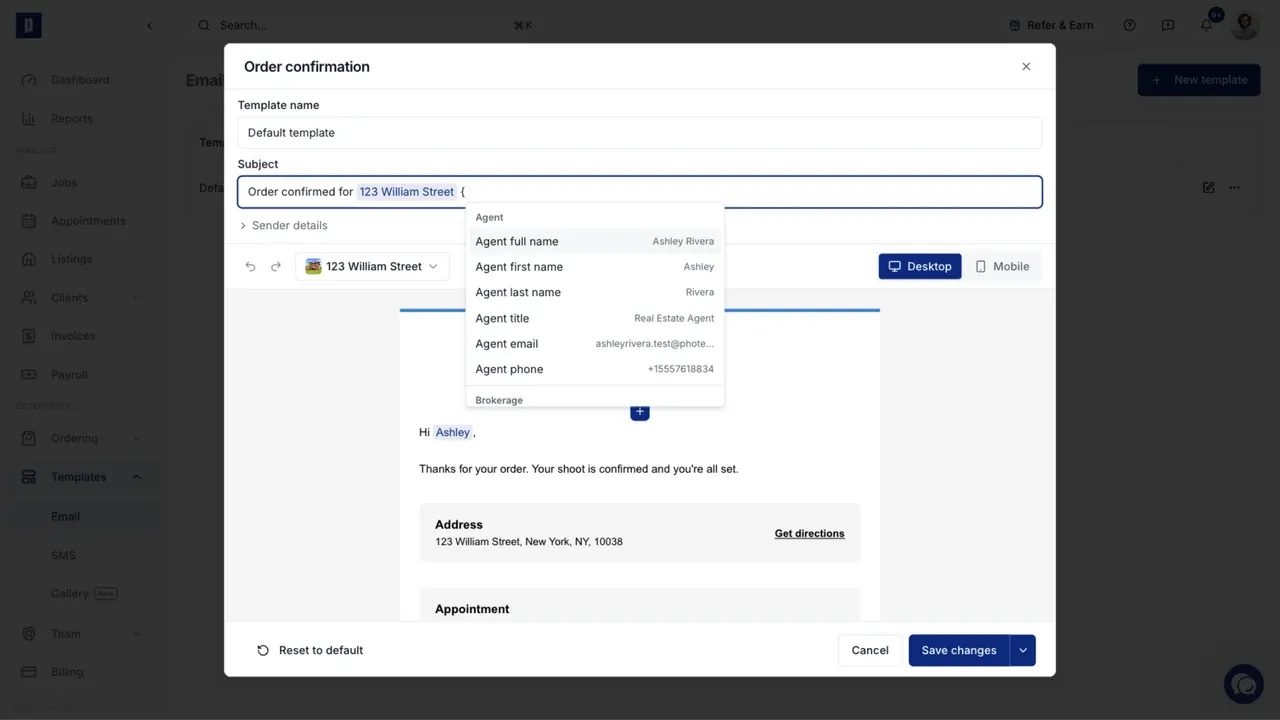
Variables add record-specific text such as the agent's name, property address, appointment details, invoice number, or company name.
- Place the cursor in the subject or a text section.
- Type
{. - Select a variable from the menu.
The menu shows only variables supported by that email type. When you preview with a real record, it also shows the value that will replace each variable.
Preview with real data
The preview starts in Variables mode so you can identify each dynamic field. Open that selector to choose a real order, listing, invoice, client, or brokerage, depending on the email type.
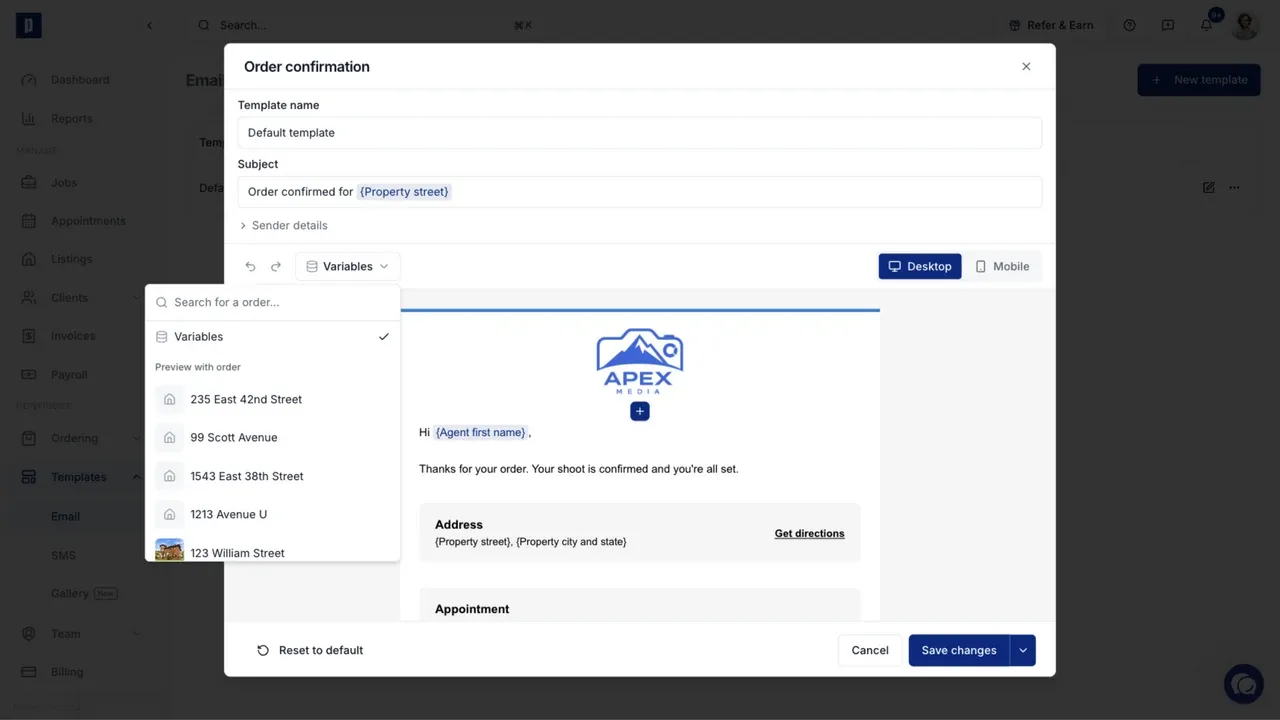
Email Studio then resolves the variables and smart sections with that record's current data. Use this view to check names, addresses, dates, amounts, links, and sections before saving.
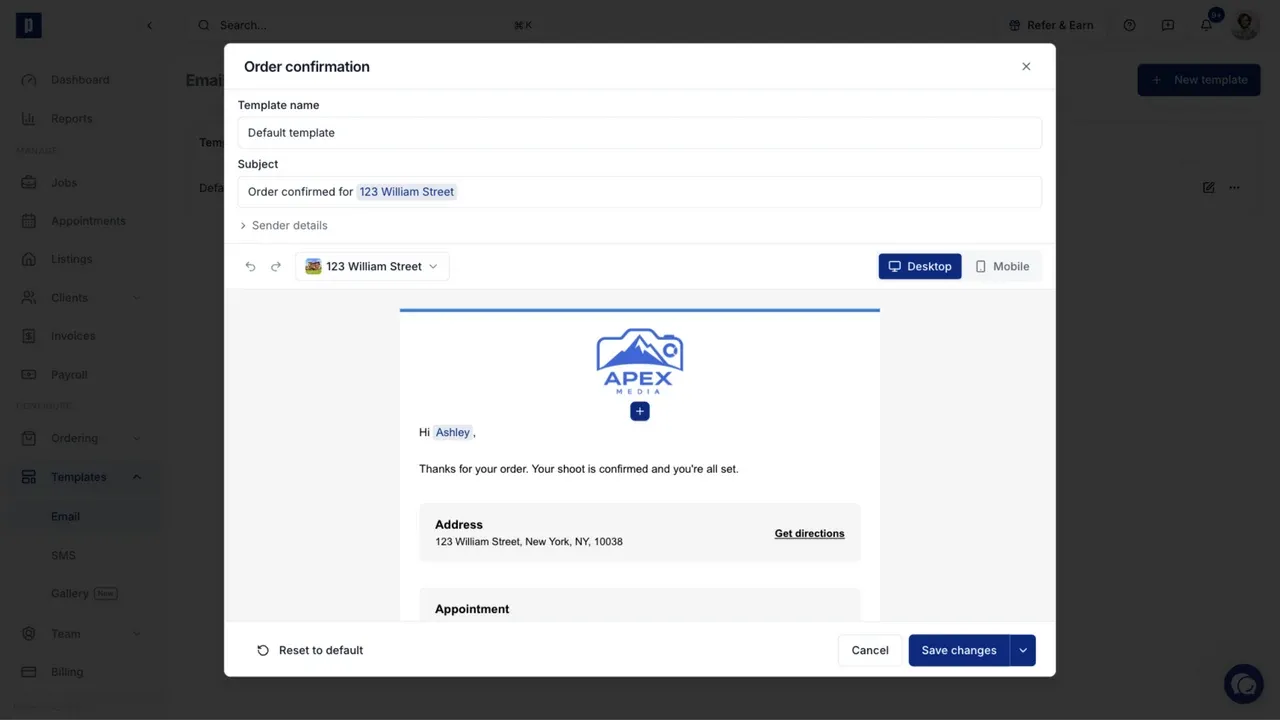
Use Desktop and Mobile to check both email widths.
Set the sender and send a test
Expand Sender details to change the sender name or add a custom reply-to address. If your organization has a verified email sending domain, you can also set the address prefix used with that domain.
Select the arrow beside Save changes, then select Send test email to send the current version to an address you choose.
See Email Sending Domain to send from your own domain.
Save or restore a template
Select Save changes when the subject, content, and preview are ready.
Select Reset to default to restore the template's starting content. For the default template, this restores Photeria's built-in version. For an additional template, it restores the current default template's content.